

We are in the month of May and the bears come out of their caves to start a new cycle.
Our little Kuma has grown up during her hibernation and has become a beautiful and tender Bear Mom! ♥ ♥ ♥ … Next to Kuma, come their little suns to be part of this great family!
Free Amigurumi Crochet Pattern
< Kuma’s > Bear Family

A year ago Kuma came to our lives with her friends Neko, Buta and Nezumi, our Kawaii Keychains… In this time she has grown up to become a great Bear Mom ♥ … Together, with her three little ones they spend the days enjoying of nature, learning and playing until the moment of hibernation comes again.
Welcome Kuma Family !

Next you will find the pattern, and also the option to download the PDF, more detailed and to archieve with your pattern collection – Remember that with the download, which is totally free, you are collaborating with Tarturumies, giving us the possibility to continue creating free patterns to share with you all.
You can also collaborate purchasing the Premium Patterns in our Etsy Shop, we’ll be very grateful ♥

Pattern Bears Family Kuma and her little ones
ABBREVIATIONS |
|
|
|
|
|
MATERIALS |
|
KUMA
LITTLE BEARS
|
TOOLS |
|
* WE START WITH KUMA *

HEAD
Worked in continuous round – 3,5mm Hook
Round 1.- Magic Ring (6)
Round 2.- *1 inc* x6 (12)
Round 3.- *1sc, 1inc* x6 (18)
Round 4.- *2sc, 1inc* x6 (24)
Round 5.- *3sc, 1inc* x6 (30)
Round 6.- *4sc, 1inc* x6 (36)
Round 7.- *5sc, 1inc* x6 (42)
Round 8.- *6sc, 1inc* x6 (48)
Rounds 9 – 20.- 1sc in each st (48)
Round 21.- *6sc, 1dec* x6 (42)
Round 22.- *5sc, 1dec* x6 (36)
Round 23.- *4sc, 1dec* x6 (30)
Round 24.- *3sc, 1dec* x6 (24)
Round 25.- *2sc, 1dec* x6 (18)
Put the eyes in the head between the rnds.7/8, counting from the bottom and leaving 10sc distance between them. Stuff the head as you crochet. FO, leaving a long tail.

BODY
Worked in continuous round – 3,5mm Hook
Round 1.- Magic Ring (6)
Round 2.- *1 inc* x6 (12)
Round 3.- *1sc, 1inc* x6 (18)
Round 4.- *2sc, 1inc* x6 (24)
Round 5.- *3sc, 1inc* x6 (30)
Round 6.- *4sc, 1inc* x6 (36)
Rounds 7 – 16.- 1sc in each st (36)
Round 17.- *4sc, 1dec* x6 (30)
Round 18.- *3sc, 1dec* x6 (24)
Round 19.- *2sc, 1dec* x6 (18)
Round 20.- *1sc, 1dec* x6 (12)
Stuff the body as you crochet. FO, leaving a long tail.
 ARMS x2

Worked in continuous round – 3,25mm Hook
Round 1.- Magic Ring (6)
Round 2.- *1 inc* x6 (12)
Rounds 3 – 10.- 1sc in each st (12)
Stuff the arms as you crochet. FO, leaving a long tail.

LEGS x2
Worked in continuous round – 3,5mm Hook
Round 1.- Magic Ring (6)
Round 2.- *1 inc* x6 (12)
Rounds 3 – 6.- 1sc in each st (12)
Stuff the legs as you crochet. FO, leaving a long tail.

EARS x2
Worked in continuous round – 3,5mm Hook.
Round 1.- Magic Ring (8) < Make like normal ring but do not close it >.
Round 2.- To make this round, turning the crochet when we finish the Rnd.1 and crochet as if in a row .*1inc* x8 (16)
FO, leaving a long tail.

FLOWER
Worked in joined round – 2,5mm Hook
Round 1.- Magic Ring in hdc (8)
Round 2.- 1hdc in each st (8)
FO, leaving a long tail.

| FELT PARTS KUMA | ||
 |
ASSEMBLE KUMA
1.- Embroider the eyelids with a yarn of the same color as the head. Give 2 or 3 turns over the safety eye. Then embroider with white yarn a line under the safety eye.
2.- Sew the ears to the head between Rnds. 8 to 13 (counting from the top).
3.- Glue the felt ears on the crochet ears.
4.- Join the head centered to body sewing the openings of head and body together.
5.- Glue the snout (already armed) to the head between Rnds.1 to 8 (counting from the bottom) and centered between the eyes.
6.- Glue the cheeks one on each side of the snout between the Rnds.5 and 6 (counting from the bottom).
7.- Sew the legs to the body between Rnds. 1 to 5 (counting from the bottom).
8.- Sew the arms to the body between Rnds. 4 to 5 (counting from the neck seam).
9.- Embroider the tail with a yarn of the same color of the body between Rnds.7/8 (counting from the bottom). Use 4sc and give a few turns on them to give volume.
10.- Sew the flower to the head, next to one of the ears.
NOTE 1: To make the assembly, always follow the instructions and the images. It will be much easier to understand the steps.
NOTE 2: If you don’t want to glue the pieces of felt, you can sew them as an alternative!
NOTE 3: If you want more firmness to support the head of Kuma, at the time of sewing it to the body place a wire (suitable for amigurumis) with its tips bent to avoid hurting us. Place part in the body and part in the head, then continue sewing until closing the neck.

** WE CONTINUE WITH THE LITTLE BEARS **

(we will use one for the example)
HEAD
Worked in continuous round – 3,5mm Hook
Round 1.- Magic Ring (6)
Round 2.- *1 inc* x6 (12)
Round 3.- *1sc, 1inc* x6 (18)
Round 4.- *2sc, 1inc* x6 (24)
Rounds 5 – 10.- 1sc in each st (24)
Round 11.- *2sc, 1dec* x6 (18)
Round 12.- *1sc, 1dec* x6 (12)
Put the eyes in the head between the rnds.3/4, counting from the bottom and leaving 6sc distance between them. Stuff the head as you crochet. FO, leaving a long tail.
BODY
Worked in continuous round – 3,5mm Hook
Round 1.- Magic Ring (6)
Round 2.- *1 inc* x6 (12)
Round 3.- *1sc, 1inc* x6 (18)
Rounds 4 – 8.- 1sc in each st (18)
Round 9.- *1sc, 1dec* x6 (12)
Round 10.- *1dec* x6 (6)
Stuff the body as you crochet. FO, leaving a long tail.
ARMS x2
Worked in joined round – 3,25mm Hook
Round 1.- Magic Ring (6)
Rounds 2 – 5.- 1sc in each st (6)
Don’t stuff. FO, leaving a long tail.
LEGS x2
Worked in joined round – 3,5mm Hook
Round 1.- Magic Ring (6)
Rounds 2 – 3.- 1sc in each st (6)
Don’t stuff. FO, leaving a long tail.
EARS x2
Worked with 3,5mm Hook.
Round 1.- Magic Ring (8) < Make like normal ring but do not close it >.
FO, leaving a long tail.
| FELT PARTS LITTLE BEARS | ||
 |
ASSEMBLE LITTLE BEARS
1.- Embroider the eyelids with a yarn of the same color as the head. Give 2 or 3 turns over the safety eye. Then embroider with white yarn a line under the safety eye.
2.- Sew the ears to the head between Rnds. 4 to 7 (counting from the top).
3.- Glue the felt ears on the crochet ears.
4.- Join the head centered to body sewing the openings of head and body together.
5.- Glue the snout (already armed) to the head between Rnds.1 to 4 (counting from the bottom) and centered between the eyes.
6.- Glue the cheeks one on each side of the snout between the Rnds.2 and 3 (counting from the bottom).
7.- Sew the legs to the body between Rnds. 1 to 3 (counting from the bottom).
8.- Sew the arms to the body in the position you like most.
9.- Embroider the tail with a yarn of the same color of the body between Rnds.4/5 (counting from the bottom). Use 2sc and give a few turns on them to give volume.
NOTE 1: To make the assembly, always follow the instructions and the images. It will be much easier to understand the steps.
NOTE 2: If you don’t want to glue the pieces of felt, you can sew them as an alternative!
NOTE 3: If wish to use them of key chains, should only add a ring at the top.

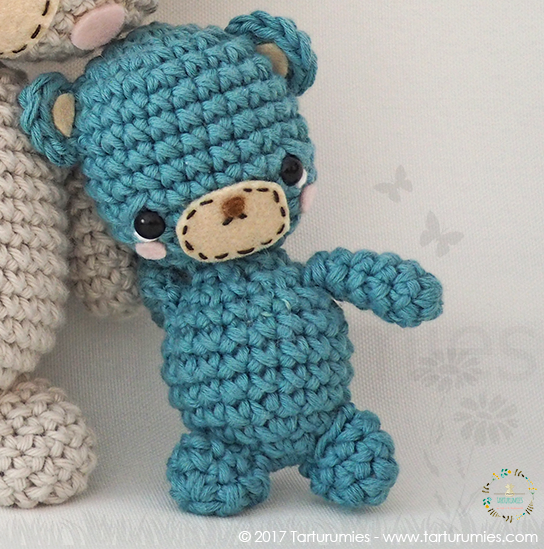
And you’re done! Enjoy your Little Teddy Bears!
To download the pattern in PDF of our Bears Family just go to the link below and choose the language. You can enjoy it and add it to the Tarturumies pattern collection!!

 List of languages available for downloading the pattern
Español – English
Click aquí para versión en Español.
Cheer up and bring us your story, tell us why you have chosen our little teddy bears and share them with us !!!
Important:
USING: Our patterns are registered with all rights reserved and they are only for personal use. You can use this pattern to make this tender amigurumi for yourself, your family and your friends. If you share your versions of the finished amigurumi in your social networks, we would appreciate you mentioning us as authors of the design, that gesture would help more people to know us and enjoy with us.
SELLING: You’re allowed to sell the amigurumis that you make with this pattern on a small scale, but please give us the credit of the design and provide a link of our publication. Please mention us in your finalish work.
SHARING: You’re allowed to share the images of our amigurumis in your social networks or website (without the pattern) but you must name us as the author of the design and must be accompanied by the link of our publication. If you share, we will appreciate it, if you doing so helps us to continue growing, creating and enjoying the beautiful art of amigurumis.
NO: This pattern or parts of it you can not: distribute it, resell it, translate it into any language, alter it, reproduce it, publish it, share it or post it (free or for sale) on the internet or in any other type of medium.
Thank you for being respectful and for your understanding!
![]()